
Steps:
- Fold your loop of crepe paper into a piece about 3 or 4 inches long. Snip through the loops at the ends so that you have a small stack of 3-4 inch long pieces of crepe paper, little rectangles that aren't connected to each other.
- Cut through BOTH short ends several times, not all the way through. It should look like this picture at right.
- Holding the crepe paper bundle together, wrap the wire around the middle (the uncut area). Cinch it and push the paper upwards. If you like, you can also fold the bundle the long way.
- Wrap around the base of the flower with masking tape and color it with your marker, or wrap with green tape.
- Fluff the petals out and twist them around so it doesn't look like a folded rectangular clump of paper any more. It should look random and scrappy. If you want, use two bundles of paper, cut and folded the same way. Twist them in the wire stem just ONCE, together.
- You'll now have double wires for your stem, which is actually easier to handle when you make the bouquets, too. Also? Sorry. I swear that's how we always made them, but maybe my hands have gotten old. This method is MUCH EASIER.
 |
| Step 2, revised. |
Thanks to the magic of video, you will need this extra information to make your own marigolds (zempasuchil) from crepe paper. Marigolds are traditional, and lovely, and orange – and the fragrance, which has been bred out of many varieties available here, is supposed to call souls especially well. But they can be hard to find if you didn’t plant them back in June.
But watch the little video and then refer here for un-clarification:
Supplies:
- Petals: Roll of crepe paper streamer, yellow, orange, or (best) golden yellow-orange.
- Stems: wire or pipecleaner (do not cut with scissors. Use an old nail clipper or buy a cheap one). Green is ideal, but color isn’t important.
- Tape, either masking tape or dark green floral tape.
- A magic marker (black or green) to color plain masking tape if you use that.
 | ||
| Step 2: the folded, cut strip of crepe paper. |
- Pull out 3 or 4 feet of crepe paper. Fold it 6 or 8 times.
- Cut into the strip (through the layers) as shown – don’t go much more than halfway through. Notch the ends similarly. Carefully, slowly, gently unfold the crepe paper.
- Bend a loop in the edge of your “stem” to create a flat area that’s easier to grip. Bend a loop at the other end to avoid poking your eye out.
- With the wire in one hand and the crepe paper strip in the other, wrap the SOLID (uncut) edge of crepe paper around the end of the stem.
- After 6 or 8 turns of crepe paper, start using tape to adhere the crepe paper to the stem. It’s okay to scrunch it up.
- Start scrunching up the crepe paper to add extra material in to the taped area – you want to be pleating or folding it as you go. You’ll find you can be pretty sloppy because the paper and the tape both scrunch easily. Do this until you’ve used up your strip of cut paper. -- finish up your tape, too, with extra twists around if necessary.
- If you used masking tape, now is your time to color it with the marker.
- Empuffen the flower: starting at the outside and working around and around, gently pull on the petals to add body to your marigold. It will not be completely regular: marigolds are scrappy little informal flowers. Kids are good at this and they have small fingers, but it can be delicate work. You won’t probably be able to go to the center – smoosh the tight center petals with your fingers if you like the effect.
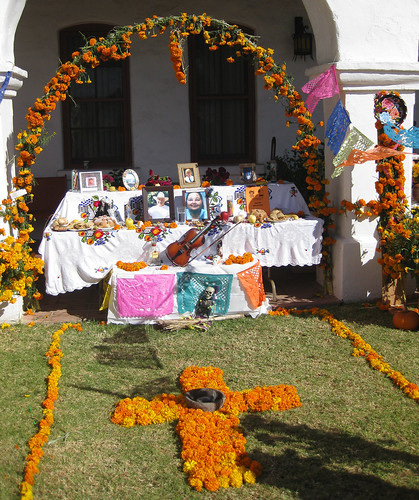 |
| Photo by Batty aka Photobat via Flickr |
It’s traditional to make a trail to the ofrenda or a pattern on the floor with marigold petals, too. If you like, you can save the little bits you cut out (above), but it will get pretty messy, especially if you have pets or kids or a breeze. And remember, the fragrance will be missing. But if you are really committed to not wasting one bit, or just adore the effect... knock yourself out!
1 comment:
Ahh, these marigolds are going to be the death of me. No bad pun intended. :P
Post a Comment